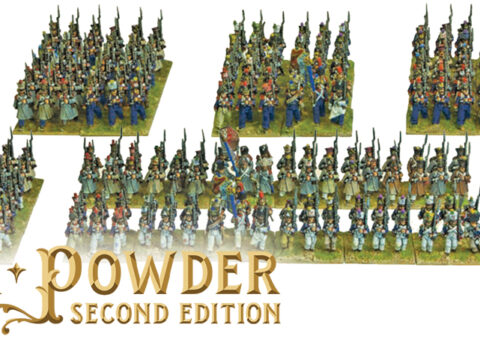
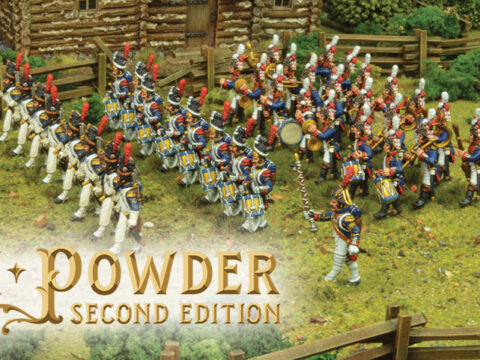
An army of the Napoleonic era decked out on the tabletop is arguably the most thrilling sight to warm a wargamer’s heart, but the road to such glory is fraught with many perils – such as painter’s block, laziness and disapproving spouses. Fear not! With a bit of forward thinking, a zest of discipline, a dash of compromise and some downright dirty, underhanded painting techniques you too can have a splendid force gracing the miniature battlefields in no time.
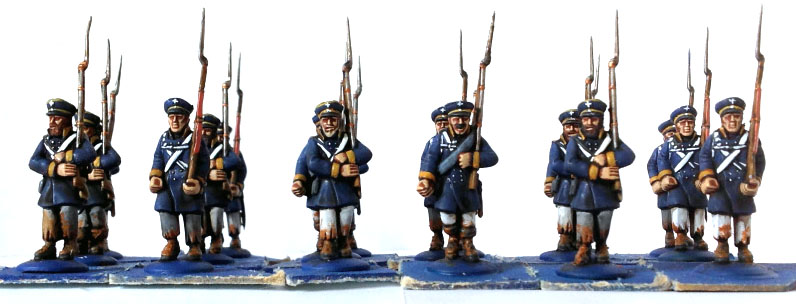
In this painting tutorial we’ll be taking on the lowly Prussian Landwehr infantry of the late Napoleonic wars. These are inevitable components of a Prussian army of the Seventh Coalition who fought at Ligny and Waterloo. Specifically we’ll be painting them up as Silesians, as it’s a lovely colour scheme and Warlord Games provides several flags for them in the box.
We won’t be touching upon the assembly of the models as there is no assembling to be done – these are single-part models. Clean up the models and put them on temporary bases – I have loads of spare plastic bases left over from before I saw the light of historical wargaming, but corks, bottle caps, bits of cardboard etcetera will do just fine.
On to the painting then!
I – Undercoat and basecoat

I suggest undercoating these models black, as their dark blue coats cover most of their bodies. Then, using your biggest brush, or airbrush if you have one, basecoat the entire model a nice dark blue (such as VMC Prussian Blue 965).
II – Some block painting

With a medium-sized brush (I use a size 3 one for this) paint the trousers white, the musket barrel a bright silver (VMC silver 995), and the shoes, cap visor and rucksack straps dark grey (VMC german grey 995). Why grey? I’ll tell you about this ridiculous time saver in the next step.
III – Black wash

Apply a black wash (I used VGC Black Wash 73201) to the entire model. The key to this wash is that everything we’ve already block painted immediately gets shaded. Furthermore, highlighting black manually is painstaking and will cost you a lot of time, so shading dark grey with a black wash is a huge time saver. Leave this stage to dry completely before moving on.
IV – Some colour

With a fine brush (I use a size 1 for these instances), basecoat the flesh a nice darkish tone (VGC Tan 066) and the cuffs, hat details and collar a nice muted yellow (VMC Goldbrown 877). My reasoning for this yellow is that a) Landwehr shouldn’t look pristine and b) the darker the yellow, the better the coverage.
Insert various curses and rude gestures: I forgot to take a picture of the next step, but it’s fairly simple. Apply a reddish brown wash to both the yellow and the flesh areas (VMC Fleshtone Shade Wash 73204) and let it dry completely before moving on.
V – Flesh highlights

Using a fine brush, paint a stark highlight onto the skin areas with a light skin colour (VMC Light Flesh 928). It’s time consuming, but if done properly this step does breathe some much-needed life into an otherwise muddled and gloomy paint scheme. This is the only layer highlight of the tutorial – I promise!
VI – Great, coats

Using your trusty size 1 brush, block paint the greatcoats – both those slung around their bodies and on top of their rucksacks – a variety of greys and blue-greys. The more the better! As you can see I botched this stage and hit the coat while at it. Not to worry, for, as Jackson Pollock said: a thick wash will cover a multitude of sins. Wash these greys with a mix of black and blue washes (VGC Blue Shade Wash 73207). You could wash them with black as well, and roll this stage into stage II and III, but I prefer the blue wash for variety.
VII – Wood

Time for the musket stocks. Paint these a nice colour of wood (I used VGC Leather Brown 72040). Might be a bit too yellowy, but that’s how I do it. If you like your musket stocks a different colour, feel free to substitute for your favourite brown. Don’t forget to paint the small axe handle that’s suspended from the belts of some of these Landwehr!
VIII – Leather

I used a yellowy brown for the musket stock because I wanted a reddish brown for the rucksack (VMC Orange Brown 981). I’m a firm believer in contrast between different textures on a model (wood, leather, cloth, metal etc.), and it does pay off to consider these matters even while painting cannon fodder!
IX – Canteens and the like

Minor detail areas such as canteen covers, pouches and bags are a great vehicle for getting some further contrast onto models. I decided the colour scheme needed more brightening so I went with a dark bone colour (VGC Desert Yellow 72063). Again, feel free to use any other colour you prefer.
XI – Brown wash
Remember that all-encompassing black wash? Time to do something similar to all the areas we just block painted. Apply a dark brown wash (VGC Umber Shade Wash 73203) to the entire musket, rucksack, canteens etc. Again, let this step dry before moving on.
XII – Musket sling

Time to add some further colour to the palette. Paint the musket sling an orange-brown (VMC Orange Brown 981), taking care to leave some shading around the golden buckles. If you prefer a more neutral colour, feel free to use something like a middle brown or beige.
XIII – Mud

Here’s a fun part. As these Landwehr are being painted for the horribly muddy affairs of Ligny and Waterloo, ’tis time to dirty up the models suitably. I’ve used a textured brown paint from Citadel (Blackfire Earth) but if you’re a Vallejo purist then any non-textured medium brown will do (I suggest VMC Flat Brown 984). Apply these with an old, splayed brush and stipple the boots and trousers to create mud blotches. Don’t fret if you hit other parts of the model with this stage – eyewitnesses from Waterloo reported that, after a night in the mud, soldiers went completely unrecognised!
XIV – Unkempt hair and luxurious moustachios

Time to finish the models’ faces – paint their hair, moustaches and/or beards in a variety of colours. I’ve used dark brown here (VGC Charred Brown 72045) but if you prefer your Prussians blonde, you can go for a bone colour or something similar.
XV – Final shading

I shade nearly everything I paint with a wash, and so I’ve applied a black wash to the dark brown hair. For blondes you can use a sepia wash, for gingers you might use a red wash etc.
XVI – The grande finale

You guessed it – the trickiest step in this painting process comes right at the end. With a fine brush, paint the cross-straps, buttons and cap ornaments white. For this step it’s important to use a white paint you’re comfortable with, and it’s certainly worthwhile to invest in a high-pigmentation version such as the P3 range. If you miss the mark while painting the buttons or straps, you can easily correct your mistake with some pure black. These white details truly make the models pop, so take your time.

Finally, you can dismount the models from their temporary bases and mount them on their final stands. Individually these models are decent tabletop quality at best, but if you rank them up en masse on a nicely textured and tufted base and add the flags, you’ve got a fine unit.
So what are you waiting for, soldat? Get those brushes working and I’ll see you on field of battle.
Gott mit uns!
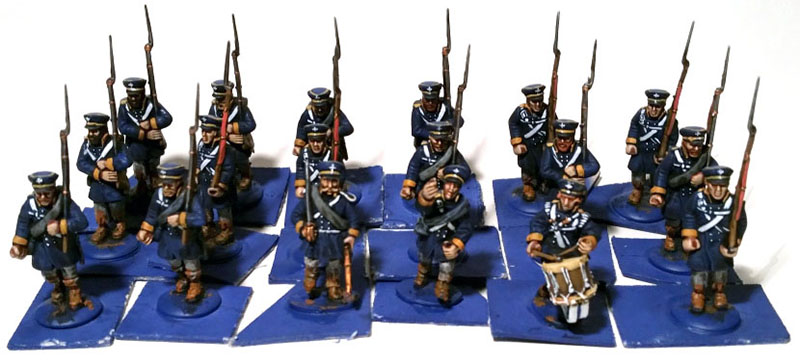
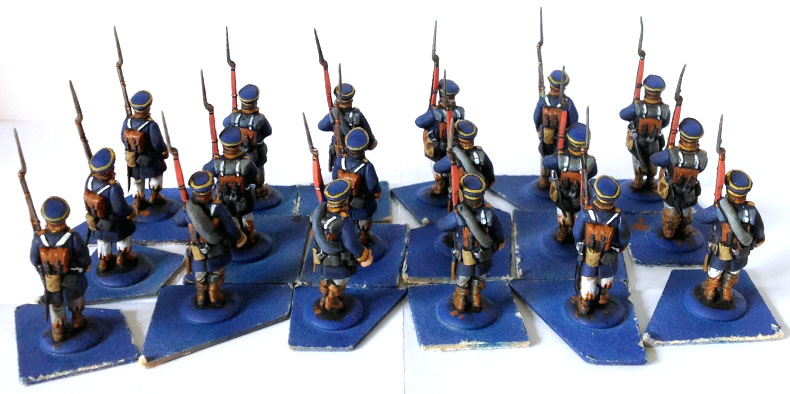
The Warlord Games plastic Prussian Landwehr have recently come back into stock after a lengthy absence – they’re available to order once more through the Warlord webstore!
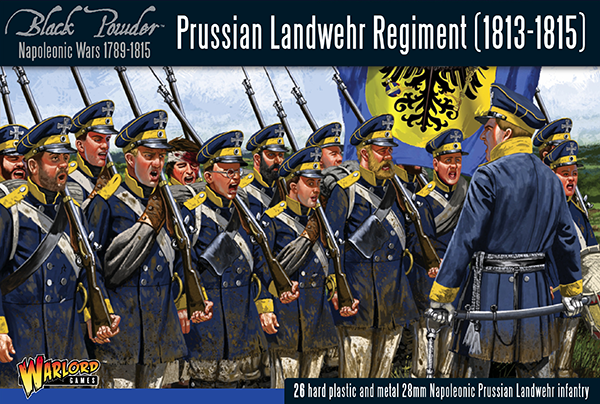
If you’re new to Napoleonic wargaming, head over to the Warlord webstore – where you’ll find a wealth of articles and information on the period!
