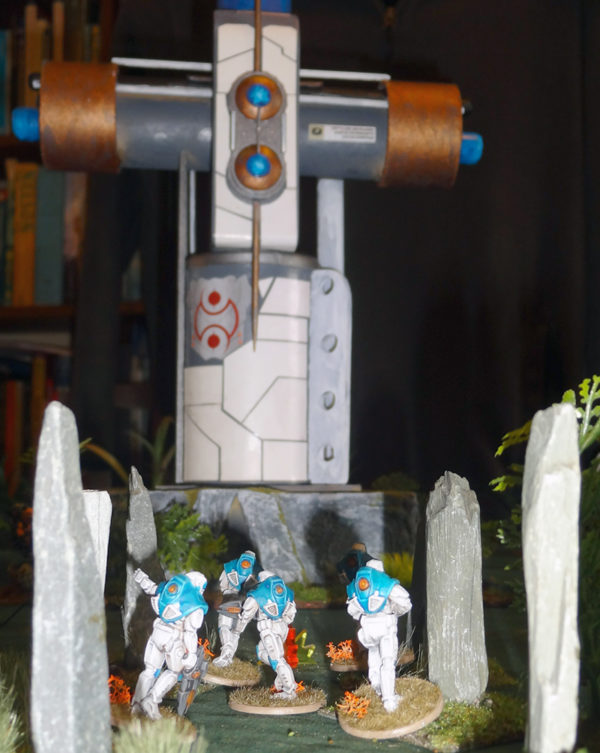
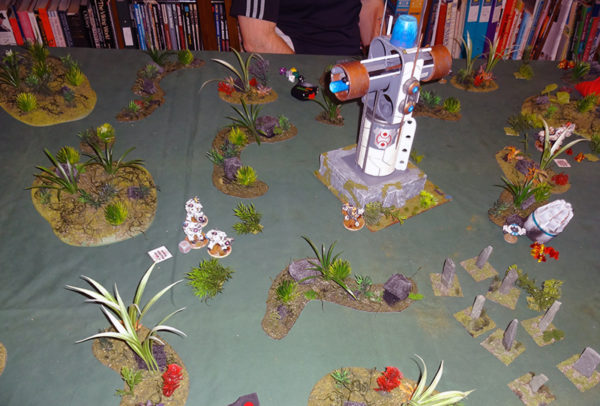
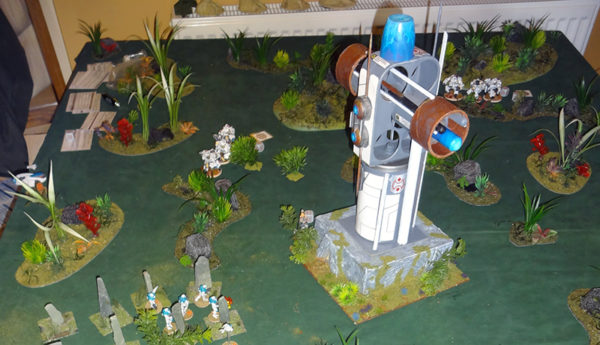
The first scenario of the Battle for Xilos is a raid by Algoryn Infantry in drop capsules to seize a vital defensive asset: a Ghar Quantum Gravity generator (QG generator). The Ghar QGs are causing havoc with the Concord’s nanosphere, making a forced landing by the troops of the Concord Combined Command almost impossible. In this scenario, the attackers have to drop their forces through the Ghar defences and into the jungles of Xilos around the QG station. Their aim? Seize and destroy the station, of course.

Whilst I had some potential jungle terrain, aka aquarium plants, that a friend had handed on (‘Can you use this, Tim?’), much was warped whilst other plants were still in their raw state. Luckily, my opponent for this particular drop game was Lea Davidson who already had a really nice array of jungle terrain: all I needed was a Quantum Gravity Generator. Station. Thingy.
Now, my Ghar have a bit of pride and really don’t want to defend a Pringles tube. Further, I’d want to use this QG station in subsequent battles as well, perhaps even rematches of this one. As a result, I wanted something that was (a) cheap and (b) looked suitably Ghar-ish.
So I headed for my big bits box high on the shelf in the garage, picking up the offcuts box on the way. I also had a quick rummage through the recycle bin (!), just in case there was anything useful. After a few minutes items began to suggest themselves and an idea began to form…

I was going to build a two-part building. The top part was to be used in any game where the Ghar had an established encampment or which could take place in an industrial zone. The bottom bit I wanted to use as a base for subsequent Xilos scenarios so wanted it to look as if it was a solid entrance to a Builder mine (not that the Ghar are worried about the Builders).
The Builder Ruin Base
This was to be intentionally blocky. The basic materials were foam board for the roof, offcuts of 12mm polyboard for the sides, and waste, 6mm, white-backed MDF. The size, of course, was that recommended in the Battle for Xilos – 6” a side for the building whilst the base was around 8” square. After cutting, gluing with PVA and leaving to set, the whole assembly was covered with a basing mix made from cheaply-sourced brown and yellow acrylic paint, filler, sieved sand, water and PVA. Waste green sawdust was sprinkled on top of the ground and some of the aquarium plants were glued on amongst the still-setting basing mix.
Once dry, this block was sprayed along with the generator using a £1 can of car grey primer. The actual ground was overpainted with a watery mix of the same brown acrylic then the building top and sides was highlight with a gentle drybrush of white emulsion (we all have some hiding in a shed, somewhere!). After that it was a case of adding detail with various browns and duns and adding tufts and hairy grass.
A Builder ruin, done. Next.
The Quantum Gravity Generator
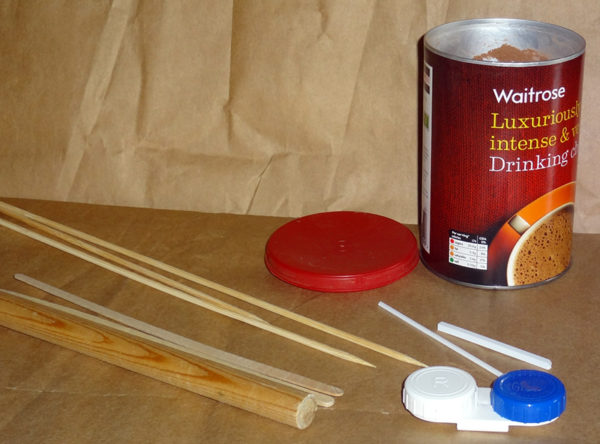
This wasn’t so easy. I experimented putting tubs and junk together until I had something I could use as a base and which featured loads of circles for that Ghar look. The first assembly was the side bars – the projectors as I like to call them. These were constructed from discarded offcuts of wooden dowel, cut to length and run through and around two different diameter mail tubes. I sanded down the ends to produce a curved appearance that I thought might match with the Ghar suits. A little bit of spacing cardboard was needed to support the tubes in the right place, but having assembled them I put them aside.
From the ‘possibly useful things’ box I found two egg trays from a fridge that went kaput a year ago. I’d salvaged them and the wine rack in the vague hope they might come in handy some day. I had already used the wine rack as the roof for an Antarean building and I was now going to be able to say ‘I told you it would all be useful’ by using the egg racks. I put them back to back and glued them with a good, gel superglue to provide a stable central frame.
However, gluing the assembled frame to the base proved difficult: there was not enough contact and the assembly would not take the weight of the projectors. So I drilled a hole with an 8mm bit, slipped through nut, bolt and multiple washers (to look good), and made sure the frame would be stable. After that, it was a case of attaching the side arms on with PVA and supporting them with various coffee stirrers and kebab sticks glued on to make it look as if the supports were an integral part of the construction rather than me panicking that the arms might fall off.

After attaching an old contact lens case and the top of my wife’s deodorant with superglue, I propped the assembly up and left it to dry. The base of the tower was a hot chocolate tub with its lid inverted (and drilled through, as above). I glued this to a 4” square base from the backed MDF and also left it to dry.
When ready, I assembled the components and added in details made from kebab sticks, coffee stirrers and wooden doweling sawn and whittled to fit. This was the tricky stage: too much detail and it would look overworked; too little and it would look like an assembly of household junk. Finally, I spray-undercoated the whole assembly liberally with cheap grey primer, coughed and remembered to open the garage door.
Over the primer I used normal modelling acrylics: bronze on the projectors; black, white & gunmetal on the connecting and supporting struts and a shaded blue on the ‘active’ areas. A dark gold and lighter grey was used to highlight the bronze and black respectively. Once more, when dry, PVA was used as a semi-glossy glaze on the blue bits.
Final Details
The grey and partially painted building looked interesting but did not have the presence I wanted. Having constructed a Ghar symbol for my blog and the Freeborn Shard’s logos, I printed this out at several different sizes and cut it out with a scalpel. A similar hack on the word processor after a search of free font sites produce some suitably ‘SF-y’ fonts that I shrunk to 6pt and put alongside some picture fonts to make a few warning patches. Whilst not necessary, I hoped the patches would add to the reality (?) of the building as I figured even Ghar might want to make sure they didn’t do anything stupid.
Raiding my print supplies for a sheet of 160gsm white card, I cut it into strips and appropriate shapes, then diagonally chopped them to make them look like panels. Using watered PVA (I get my building PVA from discount stores, too) these were placed on and brushed flat. I initially used clean water to brush over the panels but they ended up too clean for my taste so I quickly switched to dirty water from the paint bench. The key thing here, I found, was to curve them to the contours of the building by running them over the edge of a ruler whilst pressing down.
Then I went to bed, exhausted, having forgot the time and expecting everything to fall off by morning. It didn’t and once the generator was placed on top of the slab I was beginning to think it was worth it. Once the foliage was added, even I was surprised at the results.

A Quantum Gravity Generator my Ghar could feel proud to defend.


