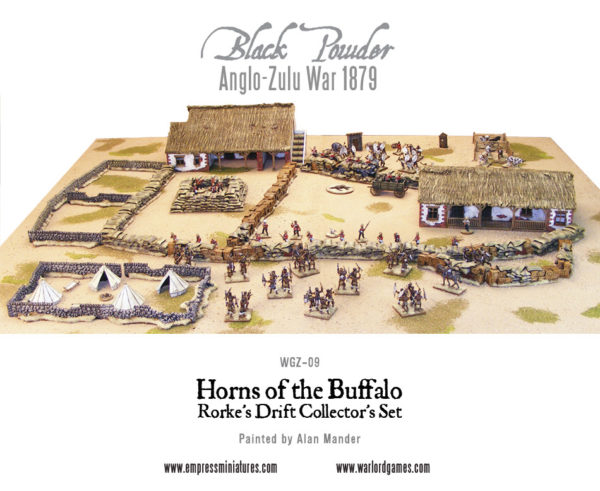
Alan Mander tells us how he painted this amazing battle set for us – over to you, Alan…
Alan: Before I get started I wanted to say that the colours specified in this guide are the colours that I used when painting the terrain for Warlord, they could be substituted for similar colours should you so desire, and should in no way be classified as ‘official’. I primarily used Vallejo’s Model Colour range aided and abetted by Army Painter’s Warpaints and Games Workshop’s Citadel Colour range. Unless otherwise stated all colours are Vallejo
The first stage is one which is perhaps the most important but is sadly overlooked by many – thorough preparation of the pieces prior to applying any paint!
Preparation
- All the resin pieces were first cleaned up to remove any mould lines and remove any unwanted ‘extras’ to the casting, this was achieved with careful use of a craft knife using a fresh blade.
- I then washed all the resin pieces in a bowl of warm water and washing up liquid to remove any oily residue that may have been left on the castings from the moulds. Be careful not to have the water too hot as you don’t want to warp any of the pieces. After the pieces had been cleaned they were left to dry on a tea towel in sunlight.
- After making sure they were all completely dry I undercoated all the terrain with Army Painter Black undercoat spray. Several light coats were built up to ensure that nowhere was missed, but at the same time none of the detail was lost.
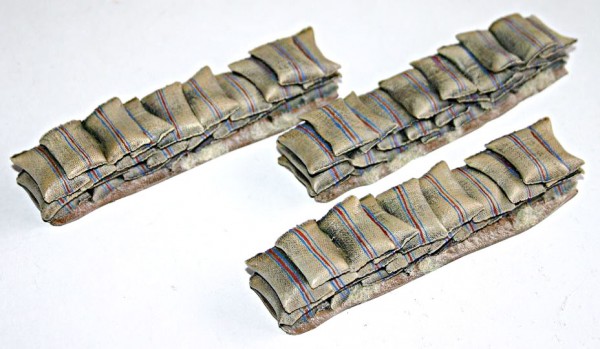
Mealie Bags and the Mealie Bag Redoubt
- The bags were given a coat of German Camo Black Brown for a base coat, making sure I’d got a good even coat over the the whole bag.
- Once this was dry the bags were drybrushed heavily with Yellow Ochre.
- This was followed with a lighter drybrush of Dark Yellow (I applied 2 coats of this to get a noticeable highlight)
- A light dry brush of German Camo Beige was then applied.
- A final dry brush of Buff was applied to the very tips of the bags, this was a very light dry brush, just to emphasise the most raised areas.
- The stripes on the bags were painted using Cadmium Red and Prussian Blue.
- The bases were then painted with Flat Earth. This was followed by a heavy drybrush of Tan Earth, then a light dry brush of Iraqui Sand. Patches of static grass were then glued onto the bases (I used a 70/30 mix of Woddland Scenics Wild Honey and Medium Green) to complete these barricades.
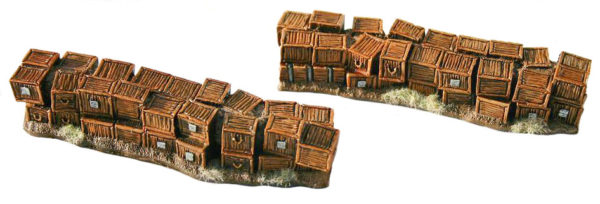
Biscuit Box Barricades and Fence Sections
- The box barricades were given a basecoat of German Camo Black Brown. Making sure there was a good even coverage.
- The first Highlight was then applied. I used Orange Brown, this was painted on following the pattern of the wood grain on the boxes.
- This was highlighted with a 50/50 mix of Orange Brown and Buff.
- Finally a thinned down Buff was painted on for the final highlights.
- The boxes were then given a wash with Citadel’s Seraphim Sepia to tone the brightness of the crates down a little.
- The rope handles on the crates were then picked out in Medium Flesh, highlighted with a 50/50 mix of Medium Flesh and Buff. A little white was then added for a final highlight.
- The Labels on the crates were first picked out in US Field Drab, this was highlighted with a thinned Buff, a final highlight of white was then painted on. Writing was added with a thinned black paint.
- Any metal bands on the crates were picked out first in black, then Oily Steel. They were then given a wash of Citadel’s Nuln Oil and then highlighted with Oily Steel.
- The Bases were then painted with Flat Earth. This was followed by a heavy drybrush of Tan Earth, then a light dry brush of Iraqui Sand. Patches of static Grass were then glued onto the bases (again a 70/30 mix of Woodland Scenics Wild Honey and Medium Green).
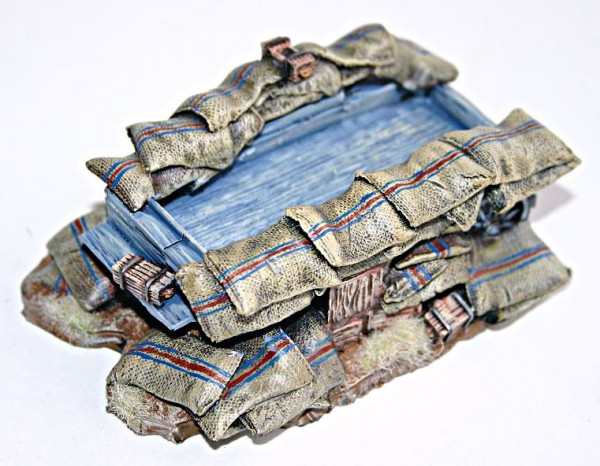
Wagon Barricade
- The boxes and mealie bags were painted in the same way as the barricades already covered above.
- The cart was painted to look like ‘treated’ wood. This was achieved by giving all the wood areas a basecoat of Oxford Blue.
- The first highlight was then applied with a 50/50 mix of Oxford Blue and Deep Sky Blue. This was followed by adding Pale Grey Blue for the next highlight. Buff was then added to the mix for the next highlight, with a final highlight of Buff being ‘streaked’ onto areas of heavy use (to give the effect of the paint having worn away) such as the seat, floor bed of the cart, etc.
- The base was then treated the same as the mealy bags and the crate barricades above.
Kraal Sections
- The wall sections were first given a basecoat of German Grey.
- This was highlighted with a heavy drybrush of German Grey and Heavy Warm Grey from the Vallejo Game Colour range (50/50 mix)
- A final light drybrush of Heavy Warm Grey was then applied.
- The bases were treated the same as all the other pieces.

Engineers Wagon and Water Cart
- Once assembled, the engineers wagon was given a basecoat of Olive Drab.
- This was highlighted with a 50/50 mix of Olive Drab and US Dark Green. Care was taken to paint the highlights on to reflect a visible wood grain (otherwise the cart would be very plain).
- The wagon was then highlighted in US Dark Green and then finally in US Dark Green and Buff (70/30 mix). These final highlights need to go on the edges of the ‘wooden planking’ that you have painted onto the cart to give them definition.
- Buff was then thinned and painted onto sections that would see high amounts of wear (to signify where the paint has worn off).
- The wheel trims where then picked out in black, they were then painted with Oily Steel, given a wash of Citadel’s Nuln Oil and highlighted with Oily Steel.
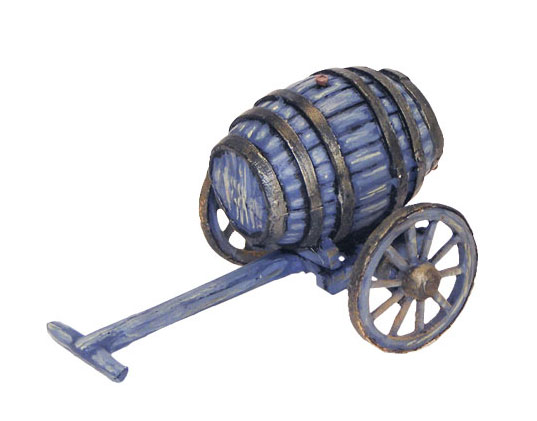
- The Water Cart was given a basecoat of Oxford Blue.
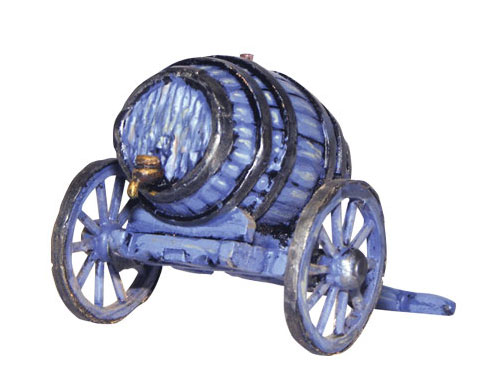
- This was highlighted with a 50/30/20 mix of Oxford Blue, Deep Sky Blue and Pale Grey Blue.
- A final highlight was added by adding Buff to the mix, again this was used to pick out the wood grain and to provide contrast between the edges of the wood on the barrel.
- A thinned Buff was then used to create the effect of paint having been worn off (as with the engineers cart).
- All metal work was painted black, then picked out in Oily Steel, washed with Nuln Oil and highlighted with Oily Steel.
- The tap on the back of the cart was picked out in Brass, washed with Brown ink, highlighted first with Brass and then Old Gold.
Cookhouse, Water Closet and ovens
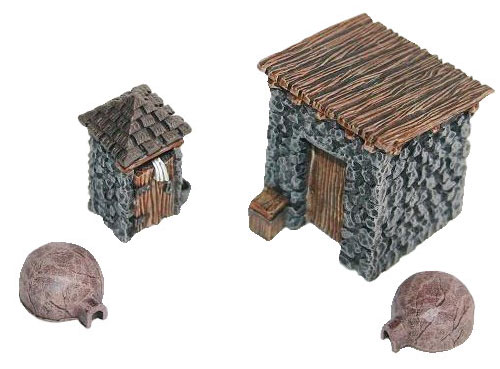
- The Stone walls on the cook house and water closet were given a basecoat of German Grey.
- A heavy drybrush of German Grey and Heavy Warm Grey (50/50) was applied.
- A final light drybrush of Heavy Warm Grey was done as a final highlight.
- All the wooden sections (doors, cook house roof and crate) were base coated German Camo Black Brown.
- The wood grain was highlighted with Orange Brown, this was followed by a highlight of Orange Brown and Buff (50/50).
- A final highlight of watered down Buff was applied to the tips of the raised grain.
- The roof for the water closet was basecoated with German Camo Black Brown. This was highlighted by adding US Dark Green (50/50 mix). Then progressive amounts of Neutral Grey was added for a further 2-3 highlights.
- The Ovens were basecoated with German Camo Black Brown. A heavy drybrush of Vallejo Game Colour Terracotta was then applied. This was followed by a lighter drybrush of Terracotta mixed with Buff (60/40 mix). A final light drybrush of Buff was then applied.
Bell Tents
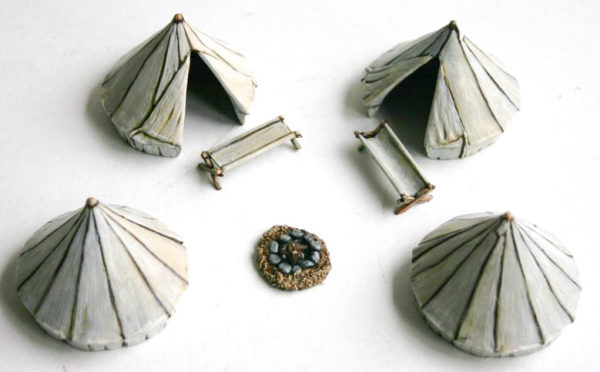
- The tents were base coated with German Camo Black Brown.
- US Field Drab (thinned slightly) was then painted onto the tents making sure to leave the recesses between the panels German Camo Black Brown.
- Buff was then used to highlight the tent again thinning it slightly. This was followed by a highlight of Buff and white (50/50 mix)
- A final highlight of thinned white was painted onto the tents- this can be built up until you are happy with the result.
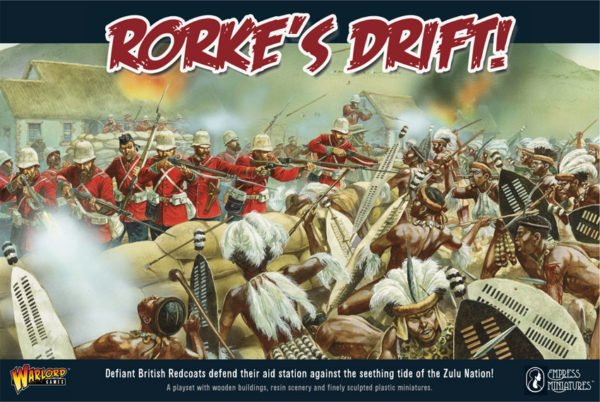
- The box contains:
- Laser-cut wooden Hospital building with ‘teddy bear fur’ thatch.
- Laser-cut wooden Storehouse building with ‘teddy bear fur’ thatch.
- Resin Wagon Barricade
- Resin stone wall Kraal (4 x 6″ sections)
- Resin biscuit box barricades (2 x 6″ sections)
- Resin biscuit box/mealie-bag barricades (3 x 6″ sections)
- Resin mealie-bag barricades (3 x 6″ sections)
- 20 plastic multi-pose British Line Infantry
- 40 plastic multi-pose Married Zulus
- Metal mounted Zulu InDuna
- Metal Zulu in British jacket firing Martini-Henry rifle
- British characters: Lieutenant Chard (Royal Engineers), Lieutenant Bromhead, Colour Sergeant Bourne and Private Hook.
- Horns of the Buffalo is only available directly from us here at Warlord Games and contains:
- 5 extra resin mealie-bag barricades
- 1 extra resin biscuit box barricade
- 4 extra biscuit box/mealie-bag barricades
- 1 extra resin wagon barricade
- 2 extra lengths of resin walls
- Resin broken down walls (6 x 6″ sections)
- Resin mealie-bag redoubt (2 x 3″ x 6″ sections making a 6″ square redoubt)
- Engineers wagon
- Water cart
- 6 plastic fences (3″ sections)
- 4 x plastic bell tents
- Resin Cookhouse
- 6 metal African cattle
- 3 x resin ovens
- Resin Water Closet
- 1 x metal dead horse
- 1 x dog (Pip the Terrier)
- British characters based on the film ‘Zulu’: Chard, Bromhead, Bourne and Hook (all made by Empress Miniatures)

![rorke-s-drift-[5]-7561-p](http://www.warlordgames.com/wp-content/uploads/2012/01/rorke-s-drift-5-7561-p-600x608.png)
