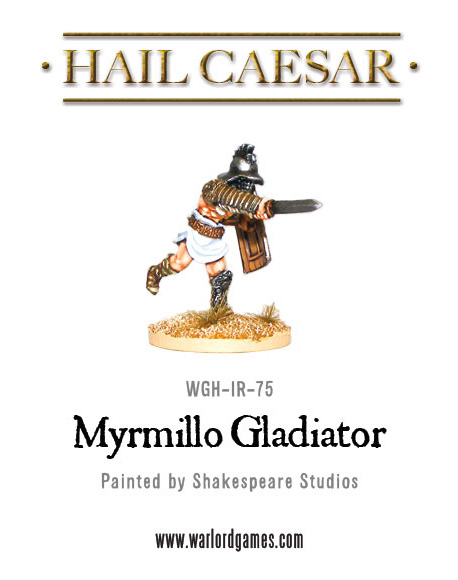
Warlord’s own in-house sculptor shows tips and techniques as his Gladiator miniature starts to take shape. Over to you, Wojtek…
Welcome back to my walk through on sculpting a miniature – in this case the Gladiator Myrmillo:
For those of you not following this series so far, part one covered tools of the trade and what you’re likely to need to sculpt your own models, whilst part two talked about inspiration and basic armature ‘dollies’. You can catch up on both of these here:
Part 2: Inspiration and armatures
This instalment is going to explain how I make components for our Gladiator such as his helmet and sword. These are parts which I will be using later on in the sculpt but I find it’s useful to start them early as it’s good to have something to work on whilst you wait for the modelling putty to dry on other parts of the sculpt.
Arms & Armour – making a helmet and a sword.
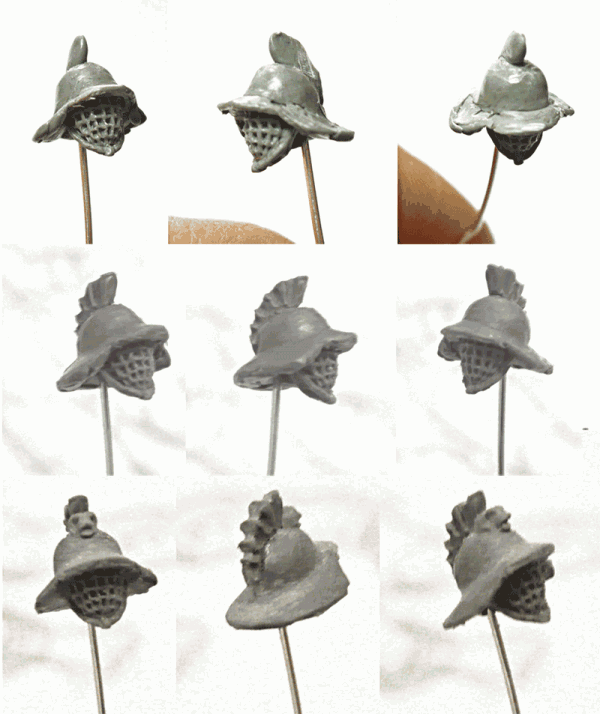
For the foundation of the head/helmet I used a piece of wire 10cm long and 0.6mm thick with a small bend on one end. To this bend I added a blob of ProCreate modelling putty. For the gladius shortsword a straight piece of wire was used with a length of ProCreate wrapped around it. Don’t worry that the sword looks bigger and blobbier than a sword should, in fact this is good as you’ll be whittling it down to size later! Both were then left to dry thoroughly.
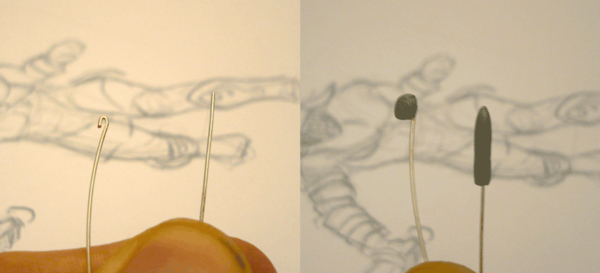
While both of these components were drying I returned to work on the armature dolly I built in the last part of this tutorial. You’ll see how I progressed on this later in this article but for I want to focus your attention on the helmet and gladius.
Cutting it close – the Gladius
After leaving our components to dry for around an hour and a half the gladius is ready for more attention. Firstly I used a sharp scalpel (it’s always worth keeping your blades fresh – they become dull rather fast) and cut the faces of the sword. Then, using finegrade wet and dry sandpaper (I use grade 280 paper) I smooth out these blade faces and file down the point (it’ll need to be nice and sharp if our hero is to survive in the arena!). This process can take a while and, as mentioned above, the bulk of the sword will reduce a fair bit as you go.

Once I have the blade looking right I’ll be putting it to one side until we have the hands finished.
Saving face – the helmet.
Now it’s dry it’s time to add more body to the blob armature. Another thicker layer of ProCreate is the start. The initial blob of ProCreate is an important stage – if you dive in with a big blob of putty without the initial stage it will move all over the place while you try to shape it. By using the dried blob from the first stage as a foundation you’ll have a solid platform to work from.
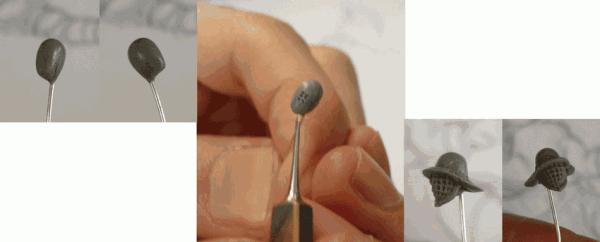
To keep the surface of the putty as smooth as the steel it is supposed to represent I use the tip of my finger with a touch of water. I very gently polish the surface – not something that is very easy with such a small area to work on!
The next step requires a fair amount of patience and a steady hand. Using a sculpting tool with a fine needle-like point (mine is home made from a fine needle) I set to making small holes in one side of the helmet to represent the mesh faceplate of our Gladiator’s helmet. It takes me about 30 minutes to complete this – as a focal feature of the model there is nothing to be gained by rushing.
At this point the ProCreate is starting to dry and although still pliable I feel it’s safe to add the rim of the helmet. If you’re feeling nervous about undoing your hard work on the face plate it’s fine to leave the putty to dry thoroughly before moving onto the next stage.
The components are then left to dry for a couple of hours.
Referring to the research material I gathered in part two of this walk-through, I build up the crown of the helmet into the correct shape, again keeping it polished with my fingertip and a touch of water.
Many gladiator helmets were adorned with crests and symbols and our man will be no different as I wanted to add a small crest. I built the crest up, again using an initial foundation of ProCreate to dry for another hour before fully detailing the crest. When dealing with finer details like this it’s not worth risking squashing all that hard work for the sake of a few minutes drying time! The final touch is to add a fish’s head to the front of the crest.
Body Building
It was time to dust off the armature dolly I made in the previous part of the walkthrough. This week legs would be added.
The first step is to add more bulk to the armature to give us the basic leg shape. Before it’s dry I take Sculpting Tool No 1 (see the initial part of my tutorial to see which that is!) and shape the gladiator’s thighs. I also added a piece of ProCreate as a foundation for his tunic as I wanted this to be flowing as he lunges in the finished model.
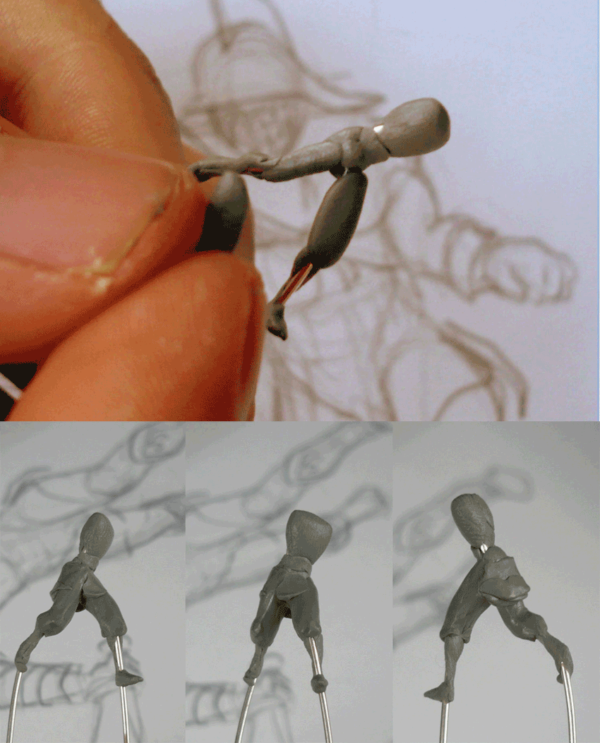
Leaving the armature for about an hour under a hot lamp it was time to get stuck into the shin guards.
To give the bulky look of a leather-wrapped boot I added a lot of ProCreate with a 50/50 mixture. Once this ‘big boot’ was in place I set to ‘cutting’ in the strapping with Sculpting Tool No 2 (yes, you guessed it – you’ll need to check out the first part of my tutorial!). This is not easy and can take a long time. Getting it finished and looking good is a very satisfying stage in the model though!
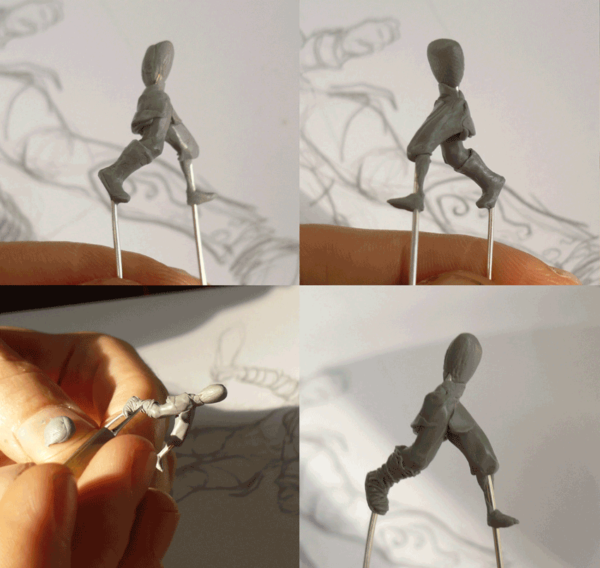
The model’s left leg is very similar to the one I had just made but the addition of a metal shin guard so I left the front of the ‘boot’ flat.
Once dry I added more ProCreate and build up the shin guard and once this was dry indulged myself with a little scrollwork detailing. I suggest you give these little details a go. You’re unlikely to be entirely happy with your first few attempts but you’ll only learn by trying.
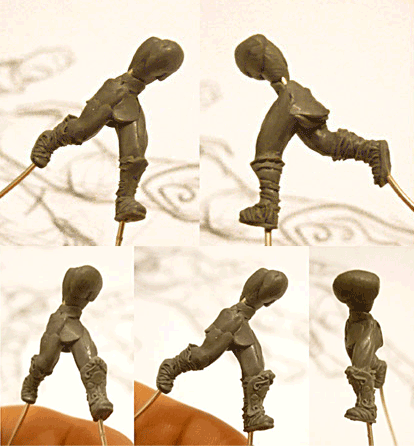
One final word from me before I end this instalment of our Gladiator’s genesis – don’t get disheartened if things don’t go right from the first attempt and as with most things to do with sculpting you need to practice, practice, practice!
Cheers,
– Wojtek
