How I assembled & painted the new 28mm US Army Infantry (American GIs), by Sascha Herm
Sascha: Hi everyone, after concentrating on a winter army for the last few months, I felt it was time for a change. So how pleased was I, when I received some of the new US Army Infantry from Warlord Games. These figures kick-started a plan for a brand new army, based on the Normandy Campaign in the summer of 1944 (no more snow and a different colour scheme).
This is my description of ‘How I Painted’ these figures from the beginning (when they arrived in the post) to basing the figures at the end. I hope it will be helpful and if you do not have these particular paints, please use similar matching shades to achieve comparable results. We all paint differently, have our own style and use the numerous paints on the market
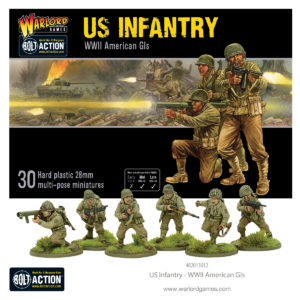 Warlord Games US Infantry – WWII American GIs
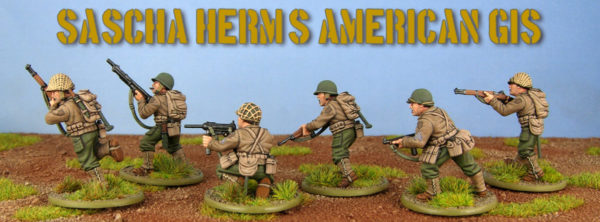
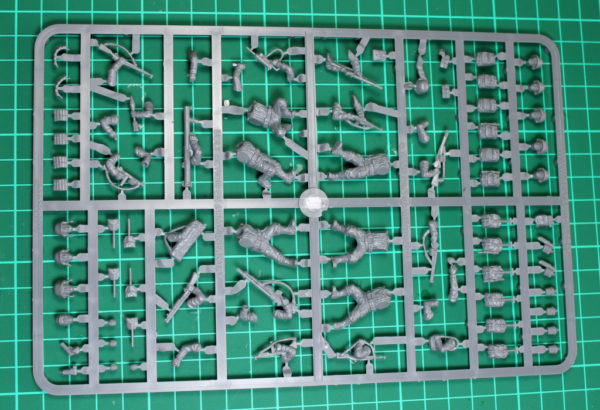
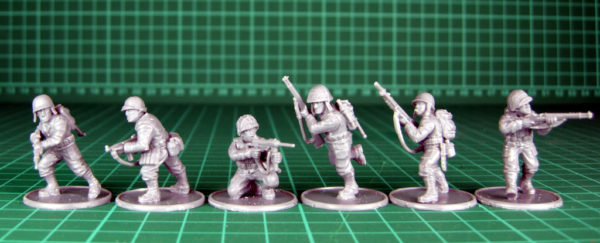
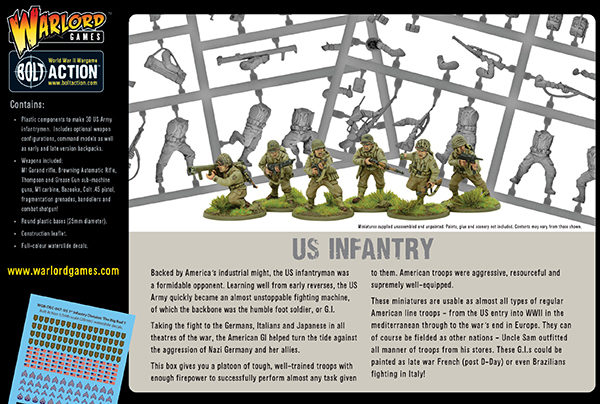
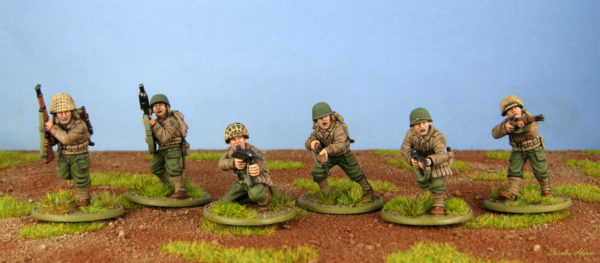
My first reaction to the hard plastic sprue of 28mm WWII American GIs was a positive one and I was really surprised at the detail of the sculpts and the realistic expressions on the faces. I could not wait to begin. There were nine different heads to choose from and from this particular sprue, I chose to use a Browning automatic rifle (BAR), an M1 carbine, a Springfield rifle, an M1 Garand rifle, a Thompson and a Grease Gun sub-machine gun.
Assembly & Preparation
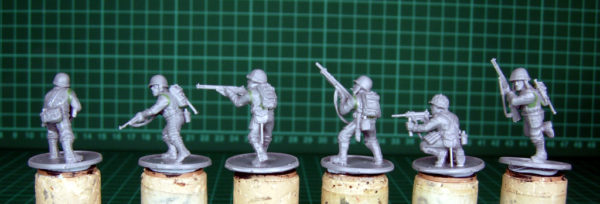
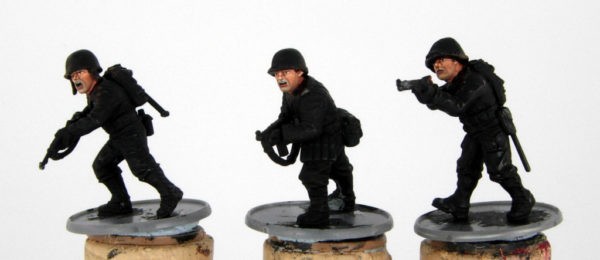
After choosing the parts for each figure, they were quickly assembled, carefully cutting each piece from the sprue and firstly dry fitting to make sure everything fits. Once I was satisfied with the way the figures looked, the parts were then cleaned, with a sharp knife and needle file, to remove any excess mould lines.
I decided to glue the figures to the included 25mm base straightaway, to limit the amount of handling and have more stability while attaching arms, weapons and equipment. I used ‘Revel Contacta plastic adhesive’ to glue all the parts together. They were then ready to be fixed onto corks with ‘Blu Tack’, there are other methods of handling a figure while painting but this is what I am used to and it works for me. I then used ‘Green Stuff’ to fill any slight imperfections or gaps in the body and equipment and as you can see, there was very little to do.
Painting the figures
I always basecoat all my 28mm figures with a black undercoat and use ‘Abaddon Black’ from Games Workshop.
The rest of the paints I use in this tutorial are all triads from the Wargames Foundry’s ‘Standard’ and new ‘World War II’ paint sets. I always use a wet palette and my paints are diluted to a ‘milk-like’ consistency and applied in very thin layers,
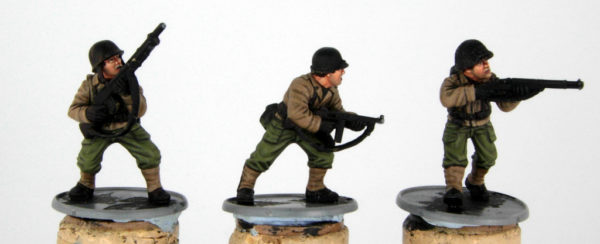
I always begin with the skin and for this, I use the ‘Expert Flesh’ set, which has 6 pots of paint. I start with base coating all flesh parts with the shade colour ‘A’. The next crucial part (which can be left out) is getting the eyes as correct as possible. I know we are painting 28mm and people have different views on this but if you practice, it can give a miniature its character. I do not use pure white for the eyes but apply EF Shade ‘F’ in the eye socket. I then carefully paint the pupil with a dark brown colour.
Next, I paint a thin line under the eye with EF Shade ‘D’. I then fill in the rest of the face using EF Shade ‘C’. The cheekbones are then lightened with EF Shade ‘D’, also the nose, brows, upper lip, chin, jaw and ears are defined with the same colour. The same parts are then further lightened with EF Shade ‘E’.
I also apply the most extreme highlights using EF Shade ‘F’ in the areas of maximum light, i.e. upper parts of the nose, lips, top of cheekbones, brows and ears.
I also paint the bottom lip with Red Brick ‘A’. I finish the face off by applying the “five-o’clock” shadow with a wash of a 2:1 mix of EF Shade ‘D’ and German Late Field Grey ‘B’. The face is now complete
As with every project, I always begin with some basic research online or in books about the era, to familiarise myself with the uniforms, weapons, equipment etc. Complete historical accuracy is not always achievable, as there are so many examples. I do try to get it about right in this scale but it should not distract you too much from the fun of painting a figure.
The next step was for me to start to paint the uniform jackets and for this, I used ‘Olive Drab’. These sculpts are very clean and crisp, which helped to accentuate the shadow, highlights and creases. Then it is on to the trousers, where I used ‘American Green’, again I liked the small details on the sculpting e.g. thigh pockets. The gaiters covering the ankles were painted with the same colour as the jacket (Olive Drab), again there are some nice raised detailing for the gaiter laces.
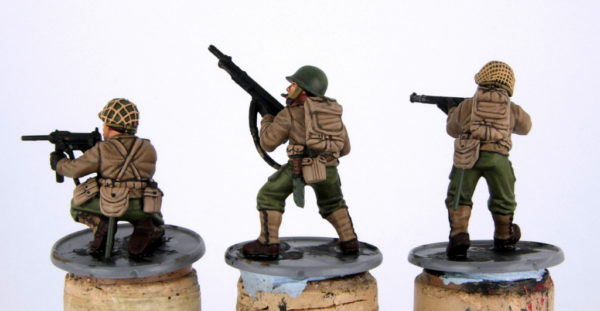
The uniform clothing is now finished, so I moved on to the helmets and webbing. The helmets were painted with ‘American Olive Green’. The camo netting over the helmet was dry brushed with ‘Buff Leather’ to emphasise the raised areas. I then painted the webbing, bags, pouches and equipment all with ‘Rawhide’.
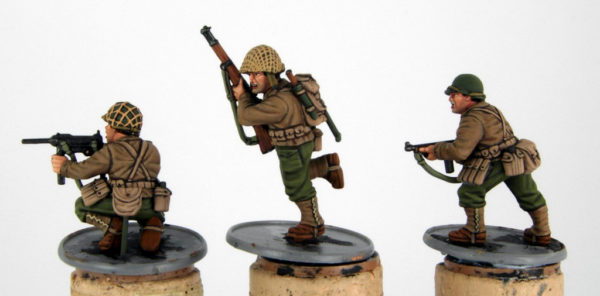
The figures are now almost finished. The wooden parts of the weapons were painted with ‘Spearshaft’ and the metals with a 2:1 mix of ‘Chainmail’ and ‘Black’. The chin straps of the helmet and shoulder straps of the weapons were painted with ‘British Blanco Green’ and finally the boots with ‘Deep Brown Leather’.
Included in the set, are some great waterslide decals which I used. They were also easy to apply. The basing was achieved with a mixture of sand and PVA glue, also some standard static grass and tufts were applied to represent the vegetation during the summer campaign.
So that’s it, the figures are now complete and ready for the gaming table. As always, choose what you feel comfortable with and whether painting or gaming, just have fun!
If you would like to follow more of my painting progress, please see my Facebook Page:
Sascha Herm – Miniature Figure Painter

